objective: i wanted to use obsidian as my editor for my blog, sync notes via > gitea, but not have on the open web. i have github for tailscale as ive covered before, so i added a public repo user/blog to start adding and editing using markdown and having saved in multiple locations.
i had obsidian running on the laptop, so the initial setup had my obsidian_notes folder setup and synced local git folder > private gitea repo > mirrored private github repo
first git folder setup
- i initally setup the repo through my gitea install on my server. i didnt intialize the repo, but did set it up as private.
- then i made a new directory – all my folders are under ~/gitea on any computer i use for continuity. i did a git clone to that gitea repo for what i called obsidian_notes
- i use ssh for gitea so I have already setup a ssh key for this purpose which allows ssh based auth so i don’t always have to input the password – tbh i am not even sure what it is 🙂
the commands look like this:
cd ~
mkdir gitea
git clone git@<URL>:<username>/<folder>.git
i recommend using a fresh install of Obsidian. i was playing around with this and realized that i needed to move/swap some folders, so i deleted my old ones, and used:
sudo pacman -Rscn obsidian
to purge the old files, made sure I had all the old attached obsidian folders deleted. then i reinstalled
sudo pacman -S obsidian
now you need to point it to the new existing folder that you have synced with your repo…
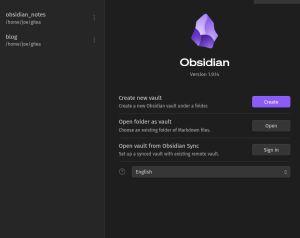
select open folder as vault, then accept the bubbles saying you trust it…of course you do. now you should be able to edit. my install also automatically pulled the community git repo and setup all the essential functions. you should see any existing notes (yes you can use this with an existing repo) and can go in and setup the sync settings, commit messages etc.
i also like to do and GIt: Open source control panel so i have access to the commits, push pulls etc
##second git folder setup
now you can do the same general steps as you did above:
1. goto bottom left corner where it shows the folder you are currently in and click the folder name
2. click manage vaults
3. select your second repo folder as an existing folder an you will see the files propogate if you have them
this time you will have to do the following for the repo to sync:
1. click the cog for settings in the bottom left corner
2. goto the community plugins page > search for git
3. install the git plugin and dont forget to enable the plugin
4. close down the app and restart
5. configure the git plugin settings as you did for the previous remote folder that was setup
now you can keep doing this for as many repos as you want to create files for!